
Full Featured Chat App in Flutter in 7 Mins - Using ZegoCloud
As a YouTube content creator, I specialize in producing high-quality videos related to cutting-edge technologies and frameworks. My areas of expertise include Flutter, Express.js, Laravel, React JS, Angular, .Net , Native Android and iOS development, Django, Tkinter and Full Stack Development. Whether you're a beginner or an advanced user, my videos are designed to help you stay up-to-date with the latest trends and techniques in the field. Join me on my channel to discover new ways to expand your skills and take your projects to the next level.
The importance of having a Chat Module in your Application cannot be overstated. It not only enhances your user's experience but also provides a secure environment for your app-related data.
However, building and maintaining your own Chat Module can be a daunting task, especially with the ever-increasing need for new features and updates.
Thankfully, third-party service providers like ZegoCloud offer a hassle-free solution that allows you to create your Chat Module in no time.
By using ZegoCloud, you can take advantage of the latest features and updates without worrying about any maintenance or update issues. This ensures that your Chat Module is always up and running, providing a seamless user experience.
With just a few simple steps, you can integrate ZegoCloud's Chat Module into your application and take your user engagement to the next level.
Setting Up Our App
- Create an app
flutter create chat_app
Adding ZegoCloud
ZegoCloud is a third-party service provider that offers a range of services to help developers quickly and easily integrate real-time communication features into their applications. Their solutions include chat, voice, and video communication capabilities, along with a comprehensive set of developer tools and APIs that make it easy to customize and scale these features to meet the needs of any application. With ZegoCloud, developers can focus on building their applications and leave the complexities of real-time communication to the experts.
Get ZEGOCLOUD UIKits (low code) for 10,000 free mins: https://bit.ly/3O0rDIV
Find out more about ZEGOCLOUD: https://bit.ly/3BWK6iB
How to create Flutter app: https://bit.ly/3WcxDQ5
ZEGOCLOUD chat SDK &API allows you to easily build your live chat apps within minutes.
Get ZEGOCLOUD UIKits (low code) for 10,000 free mins: https://bit.ly/3O0rDIV
Find out more about ZEGOCLOUD: https://bit.ly/3BWK6iB
How to create flutter app: https://bit.ly/3WcxDQ5
ZEGOCLOUD video call SDK &API allows you to easily build your live video chat apps within minutes.
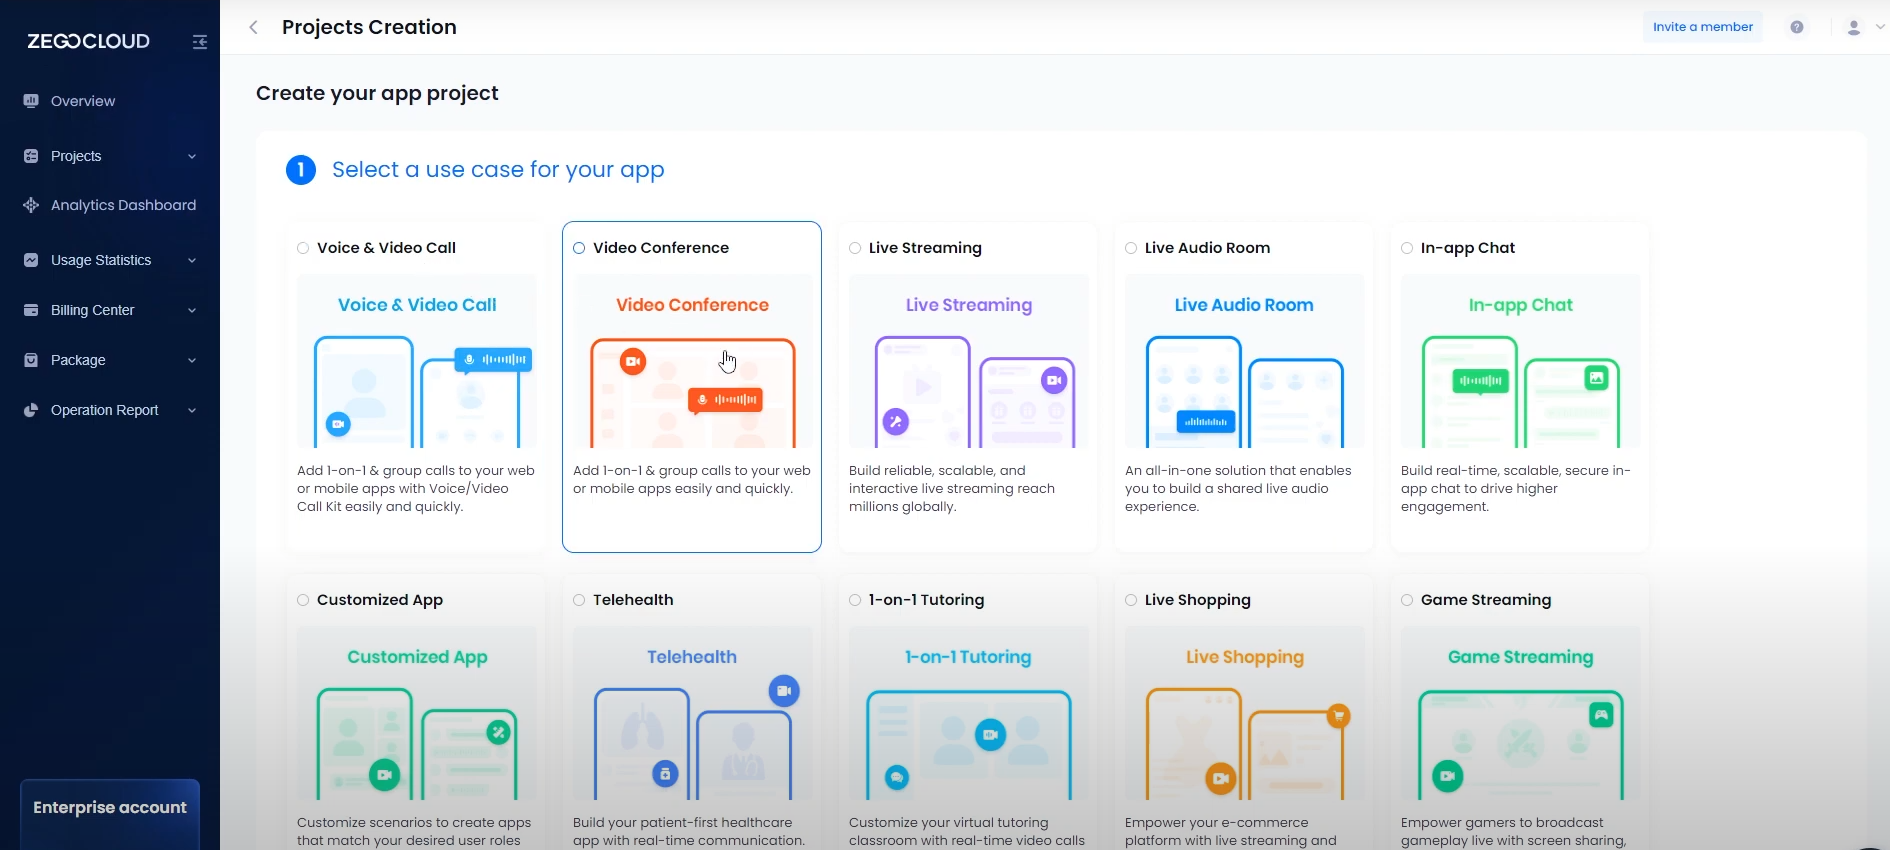
Go to https://zegocloud.com
Click on signup and create Your account.
Once you have created your account you will be redirected to their dashboard.
You may not see any project there if you have a new account. Click on `Create Project` and choose a suitable use case to get your project created.
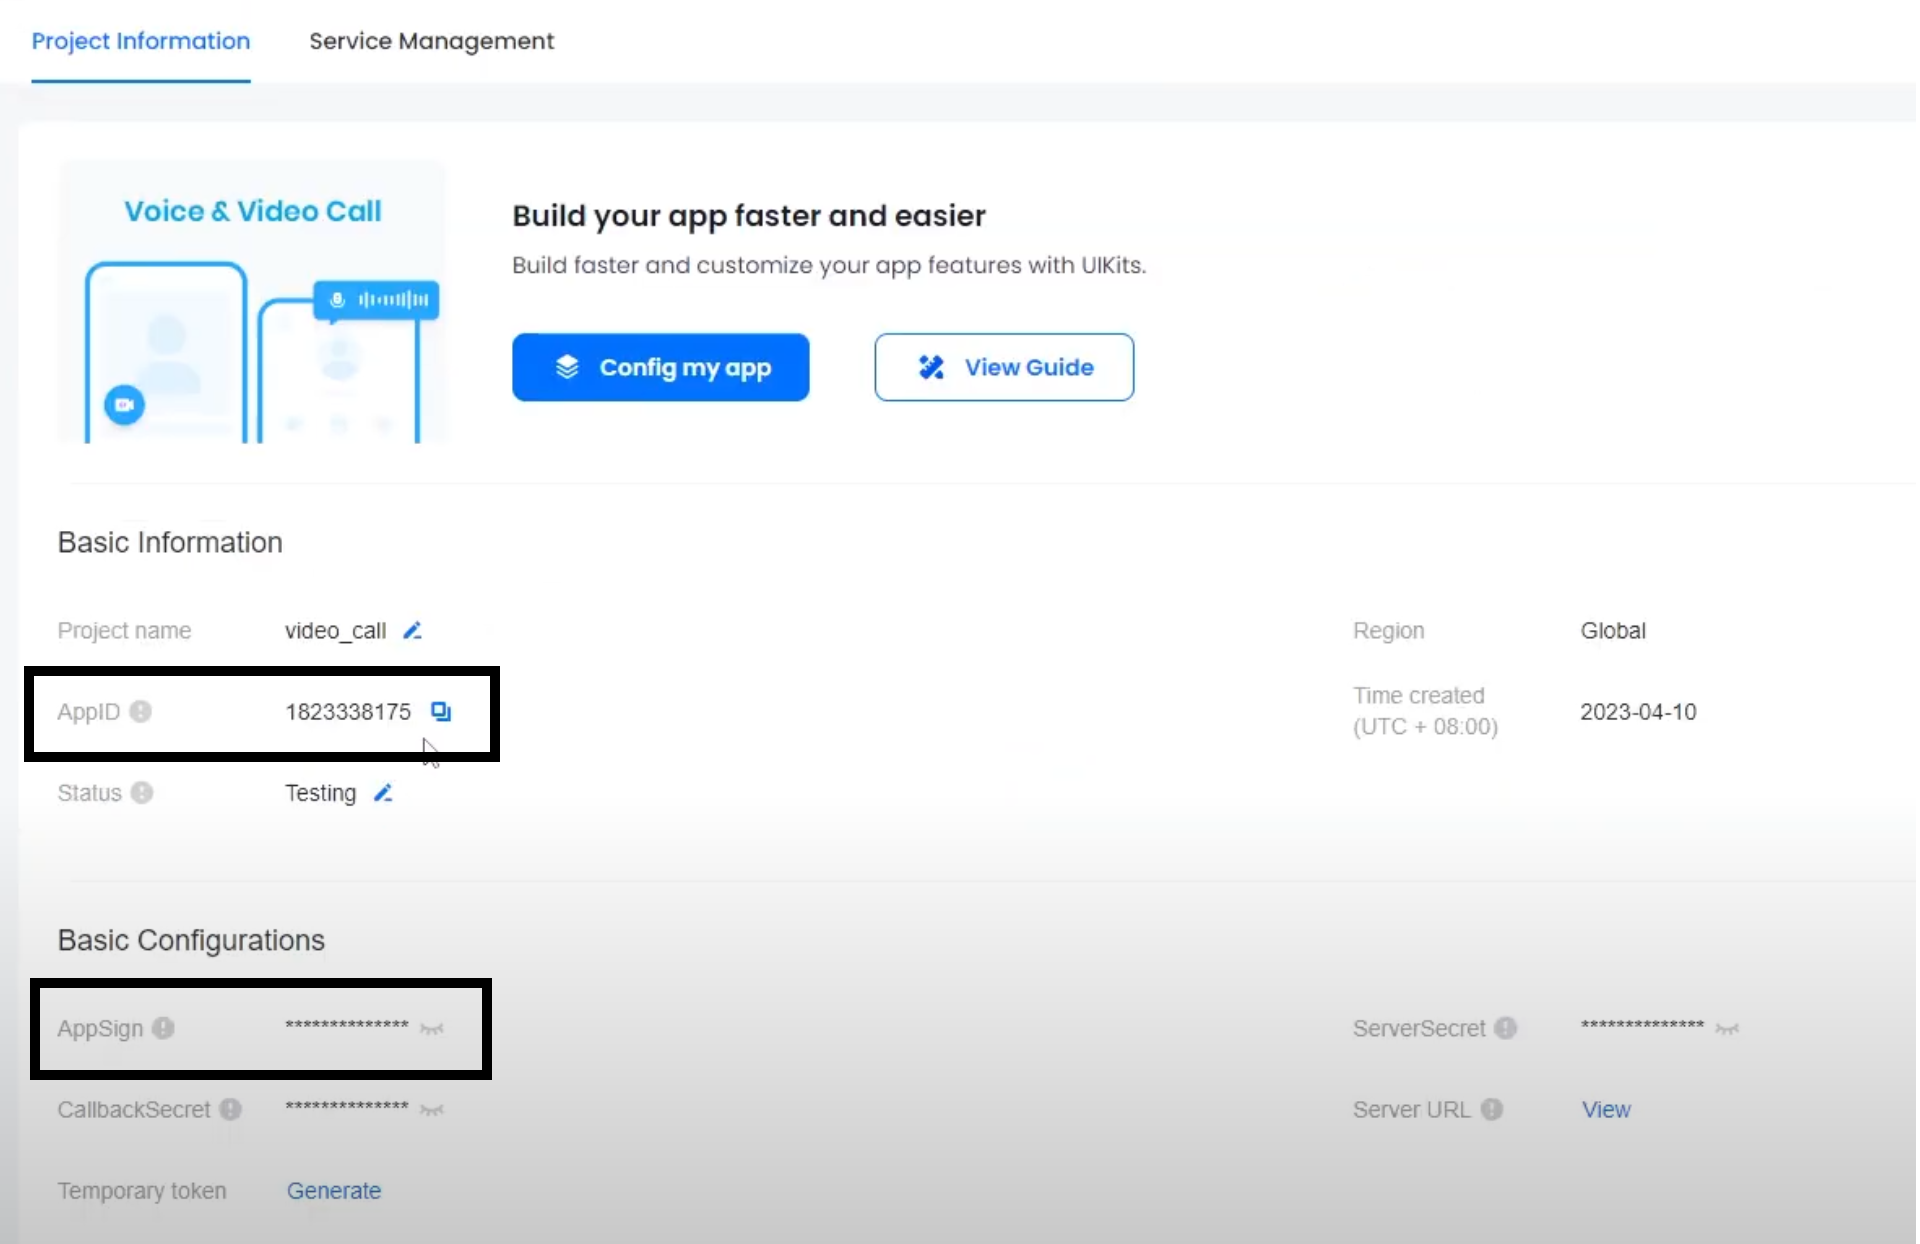
Once your project is created, go to project configuration to get the app id and app sign. It is useful while building projects and also ensure to keep it safe and secure 🔐
Adding Dependencies
Once You have set up Project, Add the following to your pubspec.yaml file
  zego_zim: ^2.7.1
  zego_zimkit: ^1.3.1
Having added them, go to `main.dart` file and initialize the SDK by adding the following lines.
import 'package:zego_zimkit/zego_zimkit.dart';

void main(){
  await ZIMKit().init(
    appID: appId,
    appSign: appSign,
  );
// rest of the code
}
Remember to use the app id and app sign we got from the console.
Connecting a User
Once the SDK is initialized, we need to connect a user that will be unique and identifiable.
Here is a sample login page with two mandatory text fields.
import 'package:flutter/material.dart';
import 'package:social_media_zego/views/sample_chat/zim_chats_list.dart';
import 'package:zego_zimkit/zego_zimkit.dart';

class ZimLogin extends StatefulWidget {
  const ZimLogin({super.key});

  @override
  State<ZimLogin> createState() => _ZimLoginState();
}

class _ZimLoginState extends State<ZimLogin> {
  TextEditingController usernmame = TextEditingController();
  TextEditingController userid = TextEditingController();
  @override
  Widget build(BuildContext context) {
    return Scaffold(
      appBar: AppBar(
        title: Text(
          "Zim Login",
        ),
      ),
      body: Padding(
        padding: const EdgeInsets.all(8.0),
        child: ListView(
          children: [
            TextFormField(
              decoration: InputDecoration(
                hintText: "User name",
              ),
              controller: usernmame,
            ),
            const SizedBox(
              height: 12.0,
            ),
            TextFormField(
              decoration: InputDecoration(
                hintText: "User ID",
              ),
              controller: userid,
            ),
            const SizedBox(
              height: 12.0,
            ),
            ElevatedButton(
              onPressed: () async {
                   // connecting code goes here
              },
              child: Text(
                "Connect",
              ),
            ),
          ],
        ),
      ),
    );
  }
}
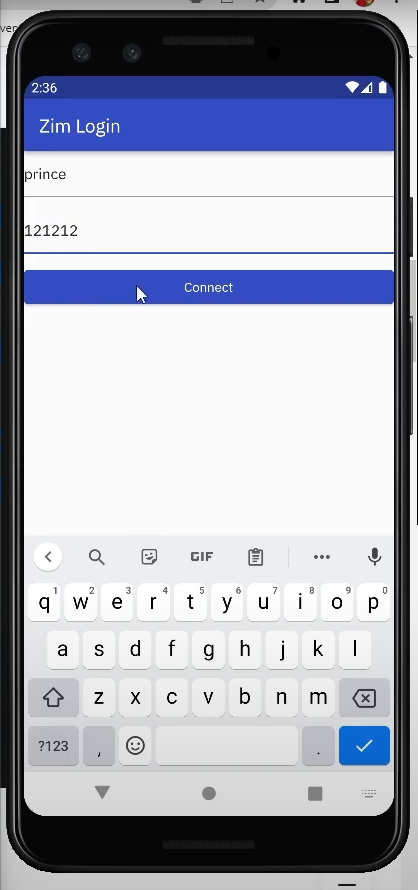
To connect a user, we need to add the following code on the button's onClick.
await ZIMKit().connectUser(id: userid.text, name: usernmame.text);
Navigator.of(context).pushReplacement(
        MaterialPageRoute(
           builder: (context) => ZimChatsList(),
        ),
 );
This will connect a user and when we are using any product this will be the uniquely identified user. In an actual application new would like to create a user id and then save it on our own server 2 to ensure that you uniquely recognise a user.
Using Chat UI Kit
A very exciting feature of ZegoCloud is the availability of UI kits for almost all products.
They make the development process a lot faster. We are going to use one such UI kit for building our chat list page and chat page.
We have already added that in the dependencies above.
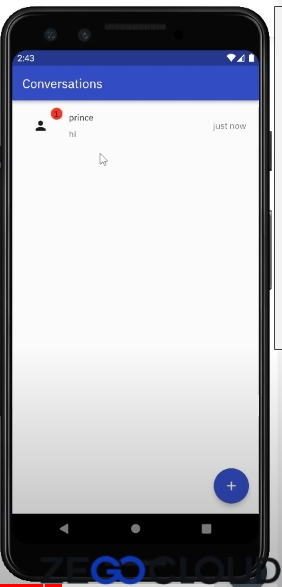
Adding Chat List Page
This will first give you a chat list page where all the users with whom you chat will be available.
Here is a code snippet using ZimKitConversationListView.
import 'package:flutter/material.dart';
import 'package:social_media_zego/views/sample_chat/zim_video_call.dart';
import 'package:zego_zimkit/zego_zimkit.dart';

class ZimChatsList extends StatelessWidget {
  const ZimChatsList({Key? key}) : super(key: key);

  @override
  Widget build(BuildContext context) {
    return WillPopScope(
      onWillPop: () async => false,
      child: Scaffold(
        appBar: AppBar(
          title: const Text('Conversations'),
          actions: const [],
        ),
        body: ZIMKitConversationListView(
          onPressed: (context, conversation, defaultAction) {
            Navigator.push(context, MaterialPageRoute(
              builder: (context) {
                return ZIMKitMessageListPage(
                  conversationID: conversation.id,
                  conversationType: conversation.type,
                );
              },
            ),
           );
          },
        ),
      ),
    );
  }
}
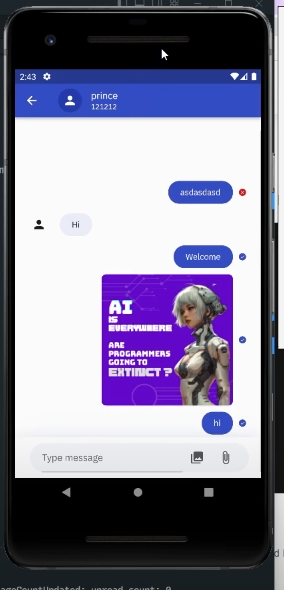
Trust me this is all the code that you need to render the chat list page and chat UI page. The UI will handle everything and you will get a nice-looking chat UI page with many exciting features like messages, sent statuses, adding media and read recipients.
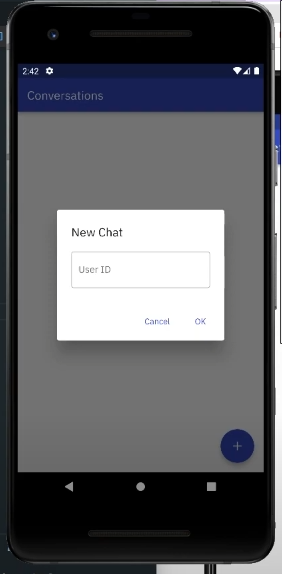
However, since you have not yet started chatting with any user you will only see the list of users who initialize the chat with you. If you want to initialize chat with someone you need to enter their ID. I will simply add a floating action button and ZIMKit can be used to start a conversation.
Here is the code snippet.
floatingActionButton: FloatingActionButton(
  onPressed: () {
     ZIMKit().showDefaultNewPeerChatDialog(context);
  },
  child: Icon(Icons.add),
),
Once Done, Here is how the Default UI Looks after Sending a Few Messages
Customizing Chat Page
Now that this is up and running don't be worried that you don't have any control over the UI. We have a lot of options available using which we can customize the UI to a great extent.
Learn More about it here: https://docs.zegocloud.com/article/15608
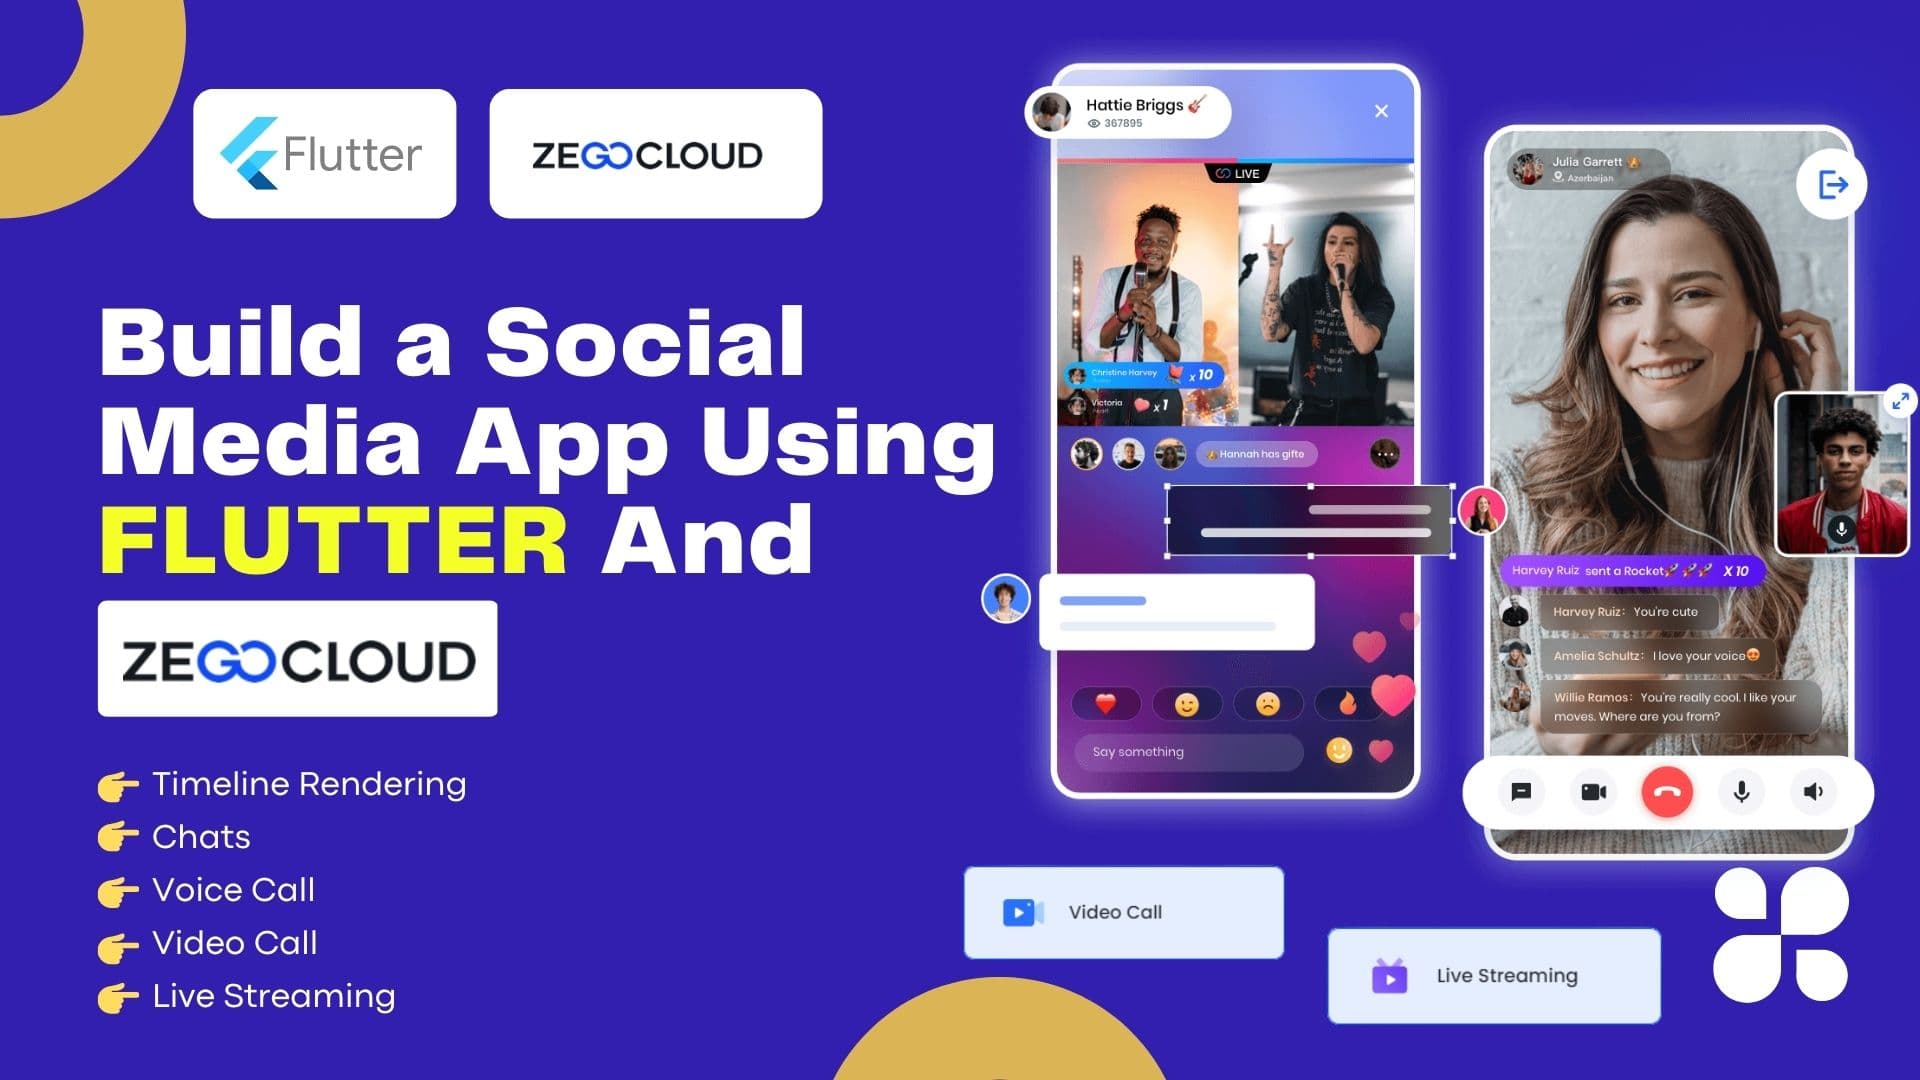
This is part of a Youtube Series Called: Social Media App Using Flutter and ZegoCloud | Voice Call, Video Call, Live Streaming and Timelines
You can Watch the Videos Here : https://www.youtube.com/playlist?list=PLlFwzkUNmr96CRZQCekbHRW22x8vJD573


